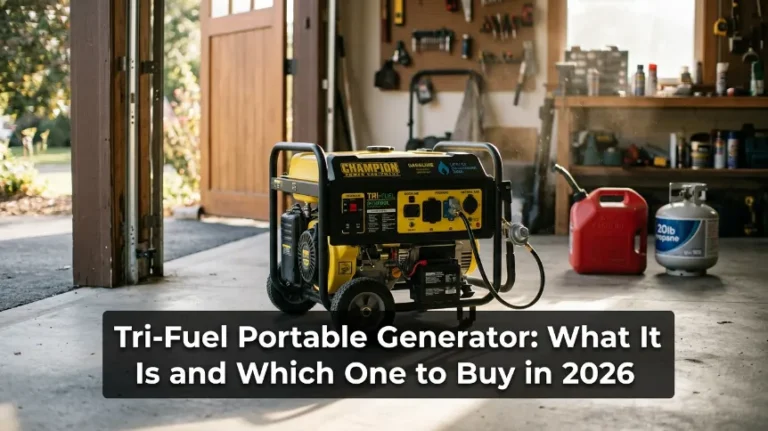
Portable Generator AVR Replacement: Step-by-Step Guide
Quick Answer
Portable generator AVR replacement usually involves confirming the regulator is faulty, disconnecting all power sources, removing the alternator end cover, documenting the old wiring, installing an exact-compatible AVR, and testing generator output afterward. Before replacing anything, compare your generator with manufacturer AVR guidance because wiring and adjustment procedures vary by model.
Quick replacement steps
- Confirm the fault: Rule out breakers, brushes, loose wiring, engine-speed problems, and damaged windings first.
- Match the AVR: Use the generator model, regulator part number, connector layout, voltage, and excitation type.
- Make it safe: Shut the generator down, unplug every load, let it cool, and prevent accidental starting.
- Record the wiring: Photograph every connector and wire before disconnecting the original AVR.
- Install carefully: Transfer connections according to the manufacturer wiring diagram and secure the regulator firmly.
- Verify output: Reassemble the generator before running it and confirm voltage is stable before connecting valuable equipment.
Important
- Never assume two similar-looking AVRs are interchangeable. Connector polarity, excitation requirements, and sensing circuits can differ.
A failed voltage regulator can make a perfectly healthy generator look like its alternator is finished. You may see no AC output, unstable voltage, or output that stays far too high or low.
I treat the AVR as one suspect, not the automatic culprit. A few checks before buying parts can save time and prevent a second electrical problem.
What Is an AVR on a Portable Generator?
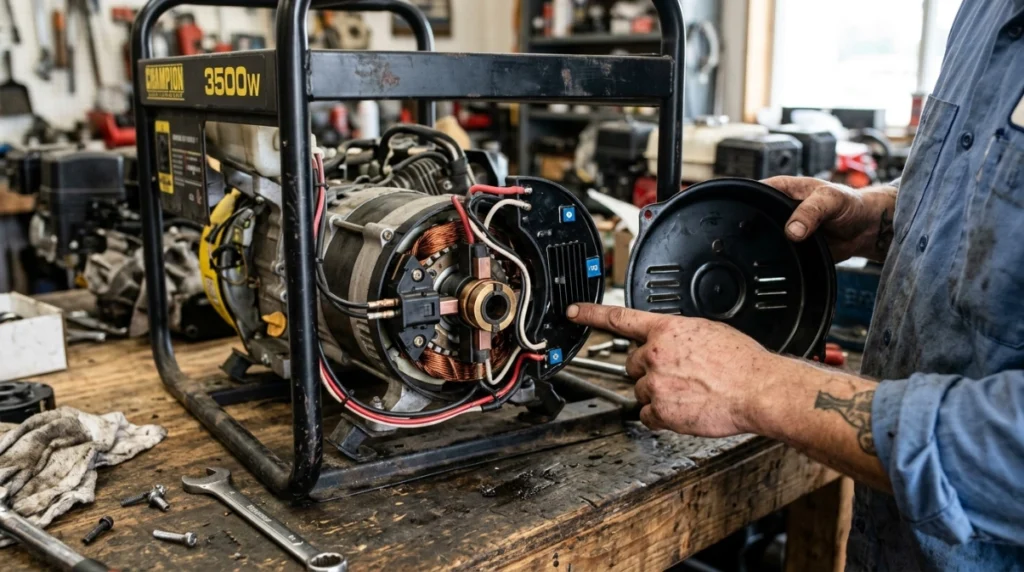
An automatic voltage regulator, or AVR, helps hold generator output voltage near its intended level as operating conditions change. It does this by controlling excitation within the alternator.
In many conventional portable generators, the regulator is mounted behind the alternator end cover. Small half-moon regulators are common on brush-type designs, although configurations vary considerably.
- Sensing circuit: Monitors generator voltage.
- Excitation output: Controls the magnetic field used to generate electricity.
- Voltage adjustment: Some regulators include a small adjustment potentiometer.
- Field connections: Brush-type generators may use positive and negative field connections.
For example, KUTAI’s EA5K3 is designed for certain small gasoline and diesel slip-ring generators. Its documentation lists specific sensing, power-input, field, and adjustment connections.
That example also shows why visual similarity isn’t enough. Always identify your generator and existing regulator before ordering a replacement.
How Do I Know If My Portable Generator AVR Is Bad?
A faulty AVR can cause no output, excessive output, low output, or unstable voltage. Those symptoms can also come from brushes, wiring, breakers, engine speed, or alternator problems.
Diagnosis matters. Replacing an AVR without checking the rest of the system can leave you with the exact same fault.
| Symptom | Check Before AVR Replacement | AVR Possibility |
|---|---|---|
| No AC output | Breaker, connections, brushes, rotor field, residual magnetism | Possible |
| Voltage too high | Adjustment setting, sensing connection, engine speed | Strong possibility if adjustment has no effect |
| Voltage too low | Engine RPM, overload, brushes, connections, windings | Possible |
| Voltage jumps up and down | Governor speed, loose connectors, changing loads | Possible |
| Generator runs but appliances fail | Receptacle voltage, breaker, cords, connected appliance | Do not assume AVR first |
Check the simple faults first
Start with the circuit breakers, outlets, wiring connectors, and brush assembly where applicable. A loose wire can imitate a failed regulator surprisingly well.
- Disconnect all appliances from the generator.
- Inspect the alternator wiring for burned or loose connectors.
- Check carbon brushes for excessive wear on brush-type generators.
- Look for heat damage, cracked resin, or burned wiring around the AVR.
- Confirm the engine reaches its normal governed speed.
Several Champion portable-generator manuals list loose wiring, faulty brushes, and a faulty AVR as separate causes of no AC output. That is a useful diagnostic reminder.
High voltage that cannot be adjusted is another clue
KUTAI’s EA5K3 documentation lists excessive output that cannot be adjusted as a condition associated with a defective AVR. That doesn’t make the same test universal for every regulator.
Use your generator manufacturer’s specifications. Never copy adjustment values from an unrelated AVR.
How Do I Choose the Correct Replacement AVR?
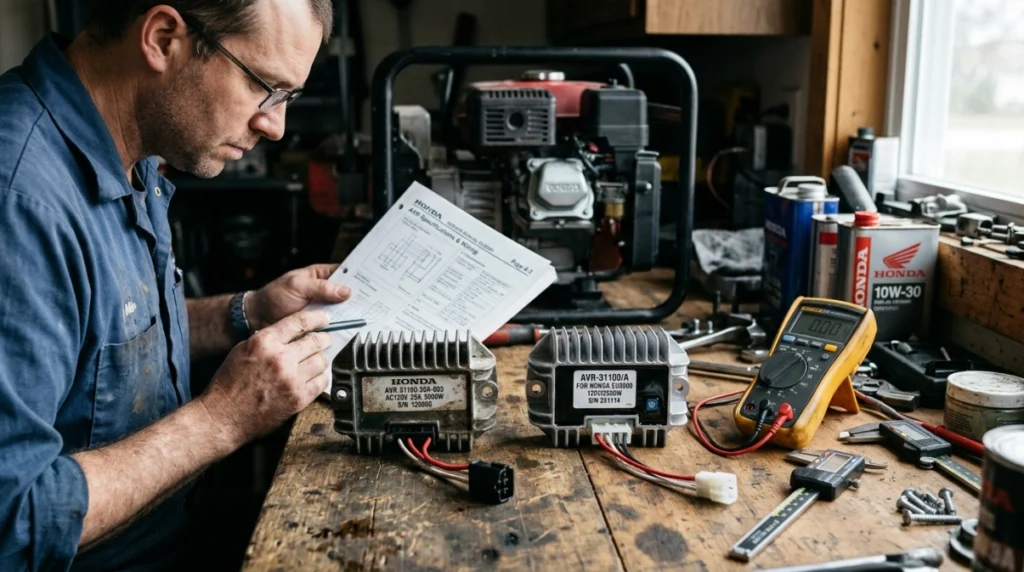
The safest replacement is the exact manufacturer-specified part or a regulator with documented compatibility. Don’t choose an AVR only because the housing and plugs look similar.
As of 2026, I still use the same practical rule: match specifications before price. A cheap incompatible regulator can turn a simple repair into alternator troubleshooting.
- Generator model: Start with the full model and serial information.
- Original AVR number: Match numbers printed on the old regulator when available.
- Rated output: Confirm the AVR supports the generator’s design.
- System voltage: Check whether the unit supplies 120V, 120/240V, or another configuration.
- Connector layout: Count plugs, pins, and separate field wires.
- Polarity: Field connections may be polarity-sensitive.
- Excitation design: Confirm whether the alternator is brush, brushless, auxiliary-winding, or another design.
- Adjustment method: Some AVRs are adjustable while others are effectively fixed for the application.
KUTAI documents its EA5K3 AVR as compatible with selected ELEMAX, Honda, Kawasaki, Kubota, Sawafuji, Suzuki, and Yamaha generator models. Compatibility is model-specific, not brand-wide.
How Do You Replace a Portable Generator AVR?
The mechanical part of an AVR replacement is often straightforward. The critical parts are preventing accidental starting, documenting the wiring, and installing the correct regulator.
If your manufacturer says AVR replacement requires an authorized service center, follow that guidance. Stop if you cannot positively identify the connections.
1. Shut the generator down completely
Turn the generator off and remove every connected load. Let the engine and exhaust system cool before opening the alternator housing.
- Disconnect the spark-plug lead on gasoline engines where appropriate.
- Disconnect the starting battery on electric-start models according to the manual.
- Remove extension cords and appliances.
- Keep the generator dry and on a stable work surface.
Portable generators also create shock, fire, and carbon-monoxide hazards during operation. Review OSHA portable generator safety guidance before testing the repaired machine.
2. Remove the alternator end cover
The AVR on many conventional portable generators sits behind a rear alternator cover. Fastener type and cover shape vary by model.
Remove only the panels required by your service documentation. Keep screws organized so every cover can be fully reinstalled before operation.
3. Photograph every AVR connection
This is one step I would never skip. Take clear photos from several angles before touching a connector.
- Photograph plug orientation.
- Record individual wire colors.
- Mark separate field wires if necessary.
- Note which terminal is positive and negative when specified.
- Save the photos until the generator passes its final test.
Wire color alone is not enough when replacement and original harnesses differ. The wiring diagram takes priority.
4. Inspect brushes and nearby wiring
Don’t immediately remove the AVR once the cover is open. Look at the components around it first.
Burned connectors, loose terminals, worn brushes, or damaged leads may explain the problem. Repairing the actual fault is better than using a new AVR as a diagnostic experiment.
5. Remove the old AVR
Disconnect plugs by holding their housings instead of pulling directly on wires. Remove separate terminals only after confirming their positions.
Then remove the regulator’s mounting screws or bolts. Avoid damaging nearby brush holders or stator wiring.
6. Compare the old and new regulators
Put both regulators side by side before installation. Stop if the connectors, wire count, field polarity, or mounting arrangement don’t match the documented replacement.
- Compare part numbers.
- Compare plug shape and pin count.
- Compare separate field leads.
- Check mounting-hole positions.
- Confirm voltage and generator compatibility.
A compatible aftermarket AVR may not look identical. In that case, you need a reliable compatibility chart or wiring diagram before proceeding.
7. Install the replacement AVR
Secure the new regulator in its proper mounting location. Tighten the fasteners enough to prevent movement without damaging the regulator body.
Reconnect wiring exactly as specified. Pay special attention to field polarity where positive and negative connections are identified.
8. Check your work before closing the cover
Inspect every connector again before reassembly. Make sure no wire can rub against the rotor, fan, or sharp metal edges.
- All connectors fully seated
- Field polarity correct
- No exposed terminals
- No pinched wires
- AVR mounted securely
- Tools removed from alternator housing
Replace the alternator cover before starting the generator. Never leave rotating or energized internal parts exposed for an ordinary output test.
Do You Need to Adjust a New Generator AVR?
Some replacement regulators provide voltage adjustment, while others should not need user adjustment. Follow the instructions for the specific generator and AVR combination.
For example, the EA5K3 documentation specifies a voltage adjustment control with clockwise and counter-clockwise adjustment. That procedure should not be copied to a different regulator without documentation.
Verify generator output after replacement
Move the generator to its normal safe outdoor operating location before running it. CPSC advises operating portable generators outdoors and away from homes because engine exhaust contains deadly carbon monoxide.
See the CPSC carbon monoxide safety guidance for current generator-placement recommendations.
- Start with all loads disconnected.
- Allow the engine to stabilize normally.
- Check output at the receptacle using suitable test equipment.
- Compare the result with the generator’s rated specification.
- Stop the generator if output is dangerously high, low, or unstable.
If you’re not trained to measure mains-level AC voltage safely, use a qualified technician. Don’t probe exposed energized alternator parts to complete this repair.
Why Is There Still No Power After Replacing the AVR?
A new AVR won’t restore output if the original diagnosis was wrong. The problem may instead be in the excitation circuit, brushes, rotor, stator, wiring, breaker, or connections.
- Brush problem: Worn or stuck brushes may prevent proper field current.
- Loose connection: A poorly seated connector can interrupt sensing or excitation.
- Reversed field wires: Incorrect polarity can prevent proper voltage build-up on applicable designs.
- Low residual magnetism: Some alternators may fail to build voltage after losing residual magnetism.
- Alternator damage: Rotor or stator faults require more advanced testing.
- Wrong AVR: A physically fitting regulator may still be electrically incompatible.
The EA5K3 troubleshooting information specifically mentions field-connection problems, reversed polarity, incorrect connections, and insufficient residual voltage as possible reasons voltage doesn’t build. Those details apply to that regulator design, so use your own manual for final diagnosis.
AVR Replacement vs. Professional Generator Repair
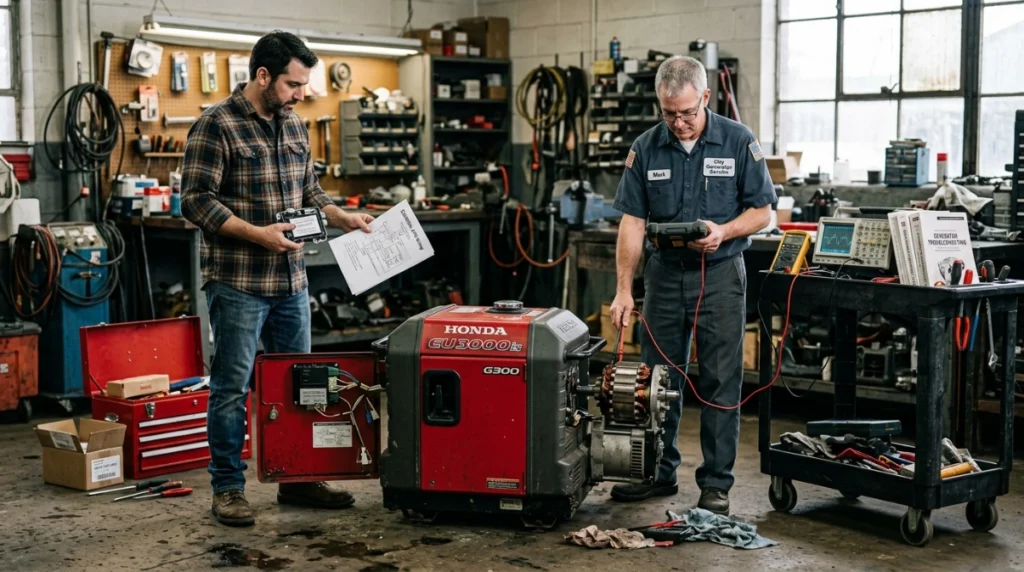
DIY replacement makes sense when you have an exact part match, clear documentation, and you’re comfortable working on de-energized electrical equipment. Professional service is the better option when diagnosis requires energized internal testing.
| Situation | DIY Replacement | Professional Service |
|---|---|---|
| Exact AVR identified | Reasonable for experienced DIYers | Optional |
| Wiring diagram unavailable | Not recommended | Recommended |
| Output remains unstable | Basic checks only | Recommended |
| Rotor/stator testing required | Advanced skill required | Best choice |
| Manufacturer specifies service center | Avoid unauthorized repair | Follow manufacturer guidance |
Champion, for example, identifies faulty AVRs in several portable-generator troubleshooting charts but directs replacement to a service center. Check your warranty and service manual before opening the generator.
Tools I Recommend for AVR Diagnosis and Replacement
If you’re ready to diagnose or replace the regulator, these are the types of tools and parts I’d consider. Confirm generator compatibility before buying any AVR.
🏆 Best Compatible AVR Pick
KUTAI EA5K3 Automatic Voltage Regulator
★★★★☆
The EA5K3 is a documented slip-ring AVR for selected small gasoline and diesel generators, with specific compatibility listings from KUTAI. I’d choose it only when the generator appears on the compatibility list or the electrical specifications are confirmed.
💰 Best Value Test Meter
Klein Tools MM325 Digital Multimeter
★★★★☆
The MM325 measures AC/DC voltage, resistance, continuity, diodes, and other basic electrical values. I like a straightforward meter for initial generator checks, provided the user understands safe mains-voltage testing.
🔧 Best for Advanced Diagnostics
Fluke 117 Electrician’s Multimeter
★★★★★
The Fluke 117 provides True-RMS measurements, non-contact voltage detection, and a low-impedance mode for electrical troubleshooting. It’s the stronger choice when generator and electrical diagnostic work is something you’ll do regularly.
Frequently Asked Questions
Can I replace a portable generator AVR myself?
You may be able to replace an AVR if you have an exact-compatible part, a clear wiring diagram, and experience working safely around electrical equipment. If the manufacturer specifies service-center replacement or energized diagnostics are required, use a qualified technician instead.
Can I install any AVR that fits my generator?
No. An AVR must match the generator’s electrical design, sensing requirements, excitation system, connector arrangement, field polarity, and operating specifications.
Two half-moon regulators can look almost identical while being electrically different.
What are the most common signs of a bad generator AVR?
Possible signs include no AC output, excessive voltage, low voltage, or unstable output. However, loose wiring, worn brushes, incorrect engine speed, breaker problems, rotor faults, and stator faults can produce similar symptoms.
Why does my generator have no voltage after installing a new AVR?
Check the wiring, field polarity, brush assembly, connectors, and replacement-part compatibility first. Some generator designs can also have insufficient residual magnetism or alternator faults that prevent voltage build-up.
Should I adjust the voltage screw on a replacement AVR?
Only adjust it when the generator or AVR documentation provides the correct procedure. Never turn an unidentified potentiometer while exposed generator components are energized just to see whether output changes.
Final Takeaway
Portable generator AVR replacement isn’t difficult when the diagnosis and part match are correct. Most costly mistakes happen when the regulator is blamed before brushes, wiring, engine speed, and alternator connections are checked.
Identify the exact generator model, document every connection, install only a proven-compatible regulator, and reassemble the machine before testing. If voltage remains abnormal, stop replacing parts and move to a structured alternator diagnosis or professional service.

Hi, I’m Michael Turner. I own a generator workshop in the United States and founded HomeGeneratorBlog to share practical, hands-on guidance about generator installation, maintenance, troubleshooting, safety, and backup power solutions. My goal is to help homeowners make smarter, more confident decisions through clear and reliable information