Portable Generator Alternator Replacement: Diagnosis, Removal, and Installation Guide
Quick Answer
Portable generator alternator replacement usually means replacing the generator head, stator, rotor, or a combination of those parts. Before tearing the generator apart, diagnose the AC output system first, because bad brushes, an AVR, wiring, or a breaker can mimic a failed alternator.
Quick replacement sequence
- Confirm the fault: Test output, brushes, AVR, rotor, and stator before ordering a generator head.
- Match the model: Order parts using the exact generator model and serial number.
- Make it safe: Shut off fuel, disconnect the spark plug and battery, and let the engine cool.
- Label everything: Photograph and mark every wire before disconnecting the generator end.
- Support the assembly: The stator and engine must stay supported when the end housing comes apart.
- Use the right puller: A tapered rotor can require a model-specific removal tool rather than prying or hammering.
Most important tip
- If live AC testing or rotor removal is outside your experience, stop after the basic checks and use a qualified generator technician.
A portable generator with a dead alternator can still start and run perfectly. That makes this failure confusing, because the engine sounds healthy while the outlets produce little or no usable power.
I use a simple rule on these repairs: diagnose from the easiest component toward the hardest one. Pulling a rotor should be one of the last steps, not the first.
What Does Portable Generator Alternator Replacement Actually Mean?
A portable generator alternator is the section that converts the engine’s mechanical rotation into electrical power. On many conventional generators, that system includes a rotor, stator, brushes, voltage regulator, bearings, and related wiring.
The terminology changes between manufacturers. A parts diagram may call the complete unit an alternator assembly, generator head, generator assembly, or power head.
- Rotor: The rotating magnetic field attached to the engine crankshaft.
- Stator: The stationary winding surrounding the rotor.
- Brushes: Carbon contacts used on many brushed generators to supply excitation current to the rotor.
- AVR: The automatic voltage regulator that controls excitation and helps regulate output voltage.
- End housing: The rear structure supporting the bearing, wiring, AVR, brushes, or terminal connections.
This distinction matters when ordering parts. For example, one Generac GP8000E parts manual lists its alternator assembly, brush assembly, and AVR as separate service items.
As of 2026, I still recommend starting with the manufacturer’s parts system, such as Generac parts support, before comparing replacement components elsewhere.
How Do You Know the Alternator Really Needs Replacement?
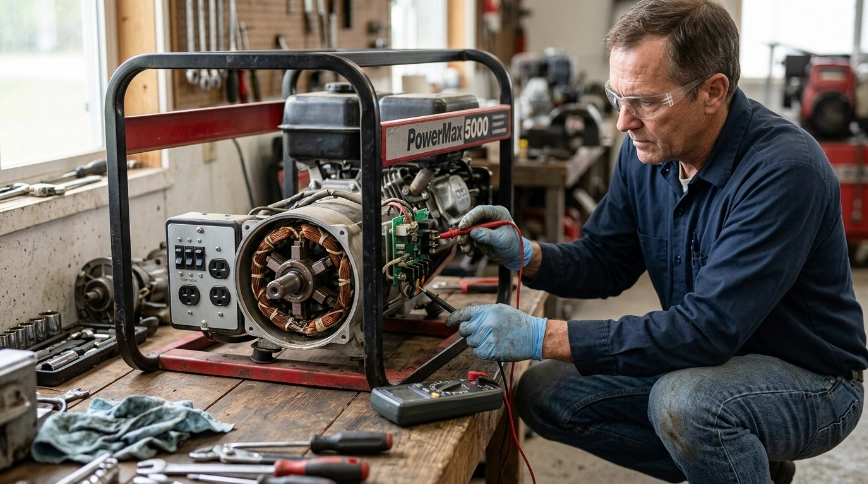
A running engine with no electricity does not automatically prove the alternator is ruined. Confirm that power disappears inside the generator head before replacing expensive mechanical parts.
Common signs that justify deeper alternator testing include:
- No AC output: The engine runs normally but every receptacle remains dead.
- One winding missing: One side of a 120/240-volt system works while another does not.
- Open rotor winding: Continuity or resistance testing shows a broken rotor circuit.
- Failed stator winding: Output or resistance tests show an open, shorted, or unbalanced winding.
- Burned winding damage: Windings show obvious overheating, melted insulation, or a strong burned-electrical smell.
- Mechanical damage: The rotor, bearing, stator laminations, or generator housing has suffered physical damage.
What should you test before removing the generator head?
Start with breakers, receptacles, connections, brushes, and the AVR when your model uses them. These repairs are far easier than separating a rotor from an engine crankshaft.
Resistance and excitation specifications are model-specific. The following numbers are examples from Champion service information for applicable brushed generator systems, not universal specifications.
| Diagnostic point | Champion example | What an incorrect reading may indicate |
|---|---|---|
| Rotor resistance | 45–75 ohms on specified brushed models | Rotor winding or connection problem |
| AVR output to brushes | 15–18 volts DC | AVR or excitation-system fault |
| Exciter winding output | 4–8 volts AC on specified systems | Possible stator or rotor excitation problem |
| Main terminal-block output | About 115–125 volts AC per 120V winding | Stator problem if the applicable winding is low |
Never copy these values blindly to another generator. Use the service information for your exact model before condemning a rotor or stator.
My diagnostic rule: If good voltage exists at the generator’s internal output point but disappears before the receptacles, I look at breakers, connectors, and panel wiring before touching the rotor.
Should You Replace the Whole Alternator, Rotor, or Stator?
Replace only the failed component when parts are available and the remaining assembly tests correctly. A complete alternator assembly makes more sense when several components are damaged or the manufacturer supplies the head only as an assembly.
| Fault | Likely repair | Relative difficulty |
|---|---|---|
| Worn or broken carbon brushes | Brush assembly | Lower |
| Rotor and stator test correctly but excitation is wrong | AVR after proper diagnosis | Lower to moderate |
| Open or damaged stator winding | Stator | High |
| Failed rotor winding or damaged slip-ring connections | Rotor | High |
| Multiple electrical or mechanical components damaged | Complete alternator assembly | High |
Inverter generators deserve special caution. Their alternator, inverter electronics, sensors, and control modules can differ substantially from a conventional open-frame generator.
Don’t apply a conventional brushed-generator procedure to an inverter model unless its service documentation calls for the same process.
What Tools Do You Need for Portable Generator Alternator Replacement?
The exact tool list depends on the engine and generator head design. The most important special tool is often the correct rotor-removal tool.
- Digital multimeter with resistance, continuity, and AC/DC voltage functions
- Metric and SAE socket set as required by the generator
- Ratchets, extensions, combination wrenches, and breaker bar
- Torque wrench covering the manufacturer’s specified fastener range
- Correct rotor puller or manufacturer-approved removal hardware
- Screwdrivers and nut drivers
- Painter’s tape or wire labels and a permanent marker
- Small containers or labeled bags for fasteners
- Wood blocks or another stable support for the engine
- Ratchet strap when the service method requires supporting the stator
- Safety glasses and appropriate work gloves
I photograph the wiring before the first connector comes apart. I also label both sides of any connection whose location or polarity could become confusing later.
Don’t assume thread locker, grease, anti-seize, or lubricant belongs on a fastener. Use those products only where the service procedure specifies them.
How Do You Replace a Portable Generator Alternator?
Most conventional open-frame replacements follow the same broad sequence: make the machine safe, disconnect the generator wiring, support the assemblies, separate the stator and rotor, then reinstall the correct parts. Your manufacturer’s procedure always overrides this general guide.
Generator engines produce carbon monoxide whenever they run. Follow current CDC generator safety guidance and perform running tests outdoors, more than 20 feet from doors, windows, and vents.
- Confirm the exact model and serial number. Match the replacement stator, rotor, or alternator assembly before dismantling the generator.
- Shut everything down. Turn the generator off, close the fuel valve, disconnect the spark plug wire, disconnect the starting battery if equipped, and let hot components cool.
- Remove obstructing components. Depending on the model, access may require removing the fuel tank, muffler guards, side panels, frame braces, or other hardware.
- Document the wiring. Photograph connections and label terminal-block, brush, AVR, ground, and stator wires before unplugging anything.
- Remove the generator end cover. Inspect the brushes, AVR, connections, and visible wiring again before committing to a full teardown.
- Protect the brushes. On brushed models, remove the brush holder when the manufacturer recommends it so the brittle carbon brushes aren’t damaged during separation.
- Support the engine and stator. Never let the weight of the generator head hang from wiring or partially installed fasteners.
- Remove the stator through-bolts and end housing. Keep track of spacers, ground wires, brackets, and isolators as they come off.
- Separate the stator carefully. Slide it straight over the rotor without scraping or striking the copper windings.
- Remove the rotor only when necessary. The rotor may be locked onto a tapered crankshaft and can require a specific puller procedure.
- Install the replacement components. Keep mating surfaces clean, align bearings correctly, route wiring away from rotating parts, and avoid forcing the stator over the rotor.
- Torque fasteners to the manual specification. Do not guess the rotor-bolt, stator-bolt, or engine-mount torque.
- Reconnect the wiring from your labels and photos. Confirm grounds and connector polarity before replacing covers.
Champion publishes a detailed rotor and stator removal procedure for specified engine-powered models. It illustrates why the correct puller and proper support matter.
Avoid levering against stator windings or hammering directly on the rotor or crankshaft. Damage caused during removal can turn a one-part repair into a complete generator-head replacement.
How Do You Test the Generator After Reassembly?
Start with a visual and mechanical inspection before running the engine. Then verify no-load output before connecting expensive appliances.
- Rotate the engine manually if the design permits. Check for rubbing, binding, or unusual resistance.
- Inspect every connection. Confirm terminals, grounds, brush leads, AVR connections, and harness routing.
- Restore the spark plug, battery, and fuel system. Check carefully for fuel leakage.
- Move the generator outdoors. Keep the exhaust directed away from buildings and openings.
- Start with no electrical load. Listen for bearing noise, rubbing, vibration, or loose hardware.
- Verify voltage and frequency. Compare measured output with your generator’s nameplate and service specifications.
- Add a modest known load. Confirm voltage remains stable before returning the unit to normal service.
The CPSC portable-generator information also highlights carbon-monoxide and electrical hazards associated with these machines. Don’t treat post-repair testing like an indoor bench test.
What Mistakes Cause Alternator Replacement Problems?
The worst mistakes usually happen before the new part is installed. Poor diagnosis and rough rotor removal cause more trouble than the basic reassembly sequence.
- Replacing the generator head without testing it: A cheap brush or connection fault may be the true problem.
- Ordering by wattage alone: Two generators with similar output ratings can use different rotors, stators, AVRs, and mounting dimensions.
- Forgetting wire locations: Take photos before unplugging the terminal block or AVR.
- Breaking carbon brushes: Remove vulnerable brushes before major disassembly when the service instructions call for it.
- Using the wrong rotor-removal method: A pry bar or hammer can damage the crankshaft, rotor, bearing, or windings.
- Guessing torque: Use model-specific specifications instead of tightening the rotor bolt by feel.
- Pinching wires: Check harness routing before tightening the end housing.
- Skipping the no-load test: Confirm output and mechanical operation before connecting appliances.
Is Portable Generator Alternator Replacement Worth It?
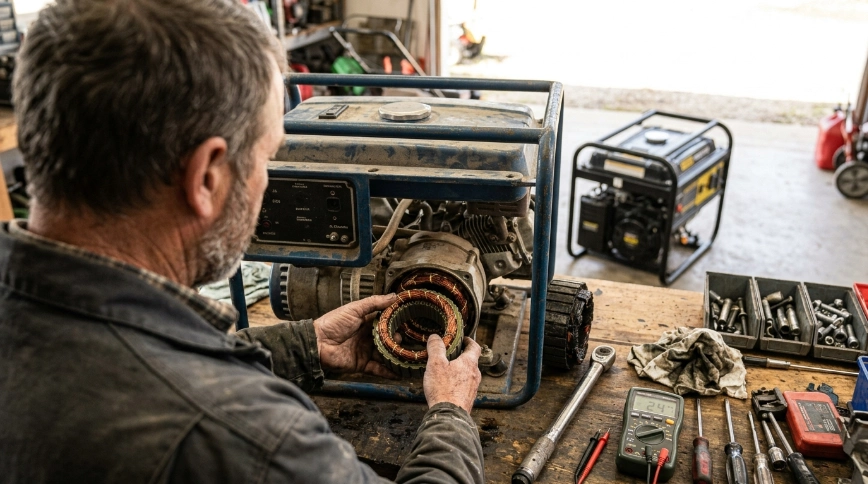
Replacement makes sense when the engine is healthy, the frame is solid, the correct parts remain available, and the repair cost is reasonable compared with replacing the entire generator. A newer commercial or higher-output machine is often easier to justify repairing.
I become more cautious when the generator already has several unrelated problems. A failed alternator plus a worn engine, leaking fuel system, damaged receptacles, and unavailable parts can turn into an expensive restoration.
Repair is usually easier to justify when:
- The engine starts easily and maintains stable speed.
- Only one generator-head component has failed.
- OEM or proven compatible replacement parts are available.
- The frame, fuel system, control panel, and wiring remain in good condition.
- You can perform most of the labor safely yourself.
Consider replacing the generator when:
- Several major systems need repair.
- The correct rotor or stator has been discontinued.
- The crankshaft or engine taper is damaged.
- Professional labor plus parts approaches the cost of a suitable replacement generator.
- The unit no longer provides enough capacity or safety features for your needs.
Tools I Recommend for Alternator Diagnosis and Replacement
If you’re planning to handle the repair yourself, these are the types of tools I’d prioritize before buying specialized parts.
🏆 Best for Diagnosis
Klein Tools MM325 Digital Multimeter
★★★★☆ 4.6/5
Measures up to 600V AC/DC, 10A DC, resistance, continuity, batteries, and diodes. I like it for generator work because it covers the core continuity and winding checks without unnecessary complexity.
🔧 Best Tool Set
GEARWRENCH 80972 243-Piece Mechanics Tool Set
★★★★★ 4.8/5
Includes SAE and metric sockets in 1/4, 3/8, and 1/2-inch drives, plus 90-tooth ratchets. I prefer a broad set here because generator frames can combine small cover hardware with much larger engine and rotor fasteners.
🎯 Best for Reassembly
TEKTON TRQ52402 1/2-Inch Torque Wrench
★★★★☆ 4.7/5
Covers 40–200 ft-lb with ±3% clockwise and counterclockwise accuracy and a 90-tooth head. I use a torque wrench only after checking the generator manual, because the tool’s range does not tell you the correct fastener torque.
Frequently Asked Questions
Can a portable generator alternator be repaired instead of replaced?
Yes. Brushes, wiring, bearings, the AVR, rotor connections, and sometimes individual stator or rotor assemblies can be repaired or replaced separately. Diagnose the failed component first, because replacing the complete generator head may be unnecessary.
Why does my generator run but produce no electricity?
A running generator with no output may have a tripped breaker, damaged receptacle, loose wiring, worn brushes, failed AVR, lost excitation, open rotor winding, or damaged stator. Check the simple electrical components before assuming the alternator has failed.
Can I replace a generator stator myself?
An experienced DIYer with mechanical and electrical testing skills may be able to replace a stator using the exact service procedure. The job becomes more difficult when the rotor must also come off the tapered crankshaft or live electrical testing is required.
Do I need a special puller to remove a portable generator rotor?
Many generators require a specific puller or manufacturer-approved removal method because the rotor fits tightly onto the engine crankshaft. Using pry bars or uncontrolled hammering can damage the rotor, bearing, stator, or crankshaft.
Are portable generator alternators interchangeable?
Usually not. Wattage alone does not establish compatibility because shaft taper, mounting pattern, winding configuration, voltage regulation, wiring, bearing size, and rotor dimensions can differ. Match replacement parts using the exact model, serial range, and manufacturer’s parts information.
Final Takeaway
A successful portable generator alternator replacement starts with diagnosis, not disassembly. Confirm the AVR, brushes, wiring, rotor, and stator before spending money on a complete generator head.
Once replacement is justified, match the exact model, label every connection, support the assembly properly, and use the correct rotor-removal method. If live AC testing or tapered-rotor removal makes you uncomfortable, handing that part to a generator technician is the safer choice.
Hi, I’m Michael Turner. I own a generator workshop in the United States and founded HomeGeneratorBlog to share practical, hands-on guidance about generator installation, maintenance, troubleshooting, safety, and backup power solutions. My goal is to help homeowners make smarter, more confident decisions through clear and reliable information